Gamer Music: destroy their ears


Do you have a musical talent? Or better yet, do you have no musical talent, but want to make some noise anyways?
Well I have some tools to let you bring your sounds and beats to discord, and any video game you play!
This Week's Hack
Unlike a lot of our weekly hacks, this hack is not a single product, but rather a combination of tools which allow you to stream crisp and clear music from your instruments directly into your computer, and from there, your games or social apps such as discord!
Why did you make this?
I have played piano most of my life, and you can bet your ass I annoyed my friends on discord with it!
The only problem is that using your mic to capture your instruments audio is not ideal. So I thought, why not find a way to stream the aux output directly into my computer, and reroute it to output just like my microphone would?
And that is what I did.
Gamer Music
Let us first go over the physical things you will need to make this work:
- Instrument with aux input
- Computer with aux input
- Aux cable
Let us begin our implementation!
VoiceMeeter
VoiceMeeter is a free to download desktop application that we will use to reroute audio internally, and mix it with our mic audio.
After plugging in your instrument to your computer, and your mic input and audio output setup, we can configure the settings needed here.
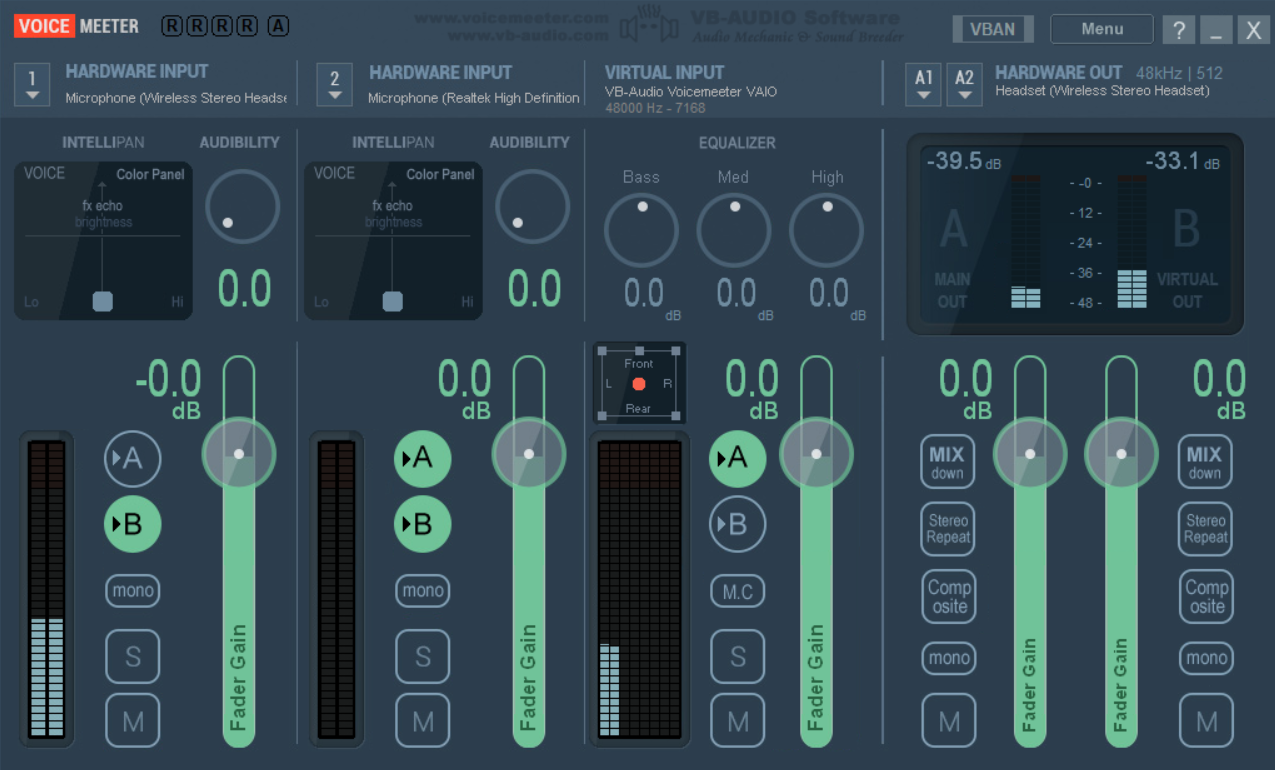
Let us move from left to right. We can see there are 4 sections.
- Hardware Input #1 (Our Microphone)
- Hardware Input #2 (Our Instrument)
- Virtual Input
- Hardware Output (Our Headset/Speakers)
We will only be modifying the Harware Inputs and Hardware Outputs. Make sure they point respectively to your Mic Input, Instrument, and Output Source.
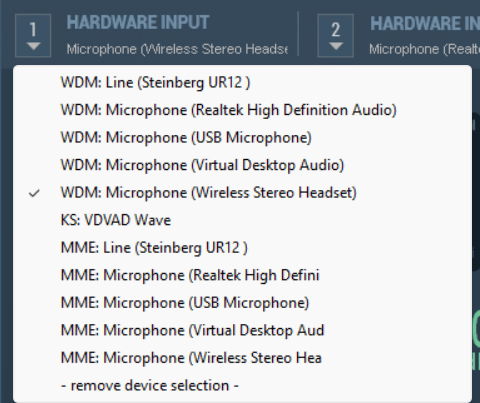
You can configure this by clicking on the top left corner of these 3 sections. Typically, we will use WDM instead of MME, as it is a more widely used for audio.
 Input Names will vary per user
Also make sure that you have A + B properly configured for each section. Having A enabled will allow you to hear the output yourself, while having B enabled will allow others to hear the output.
We don't want to hear our own voice, so we disable A for our mic input. We do want to hear our instrument, so we enable both A + B in the second section. And we leave A enabled for Virtual Input.
Audio Settings
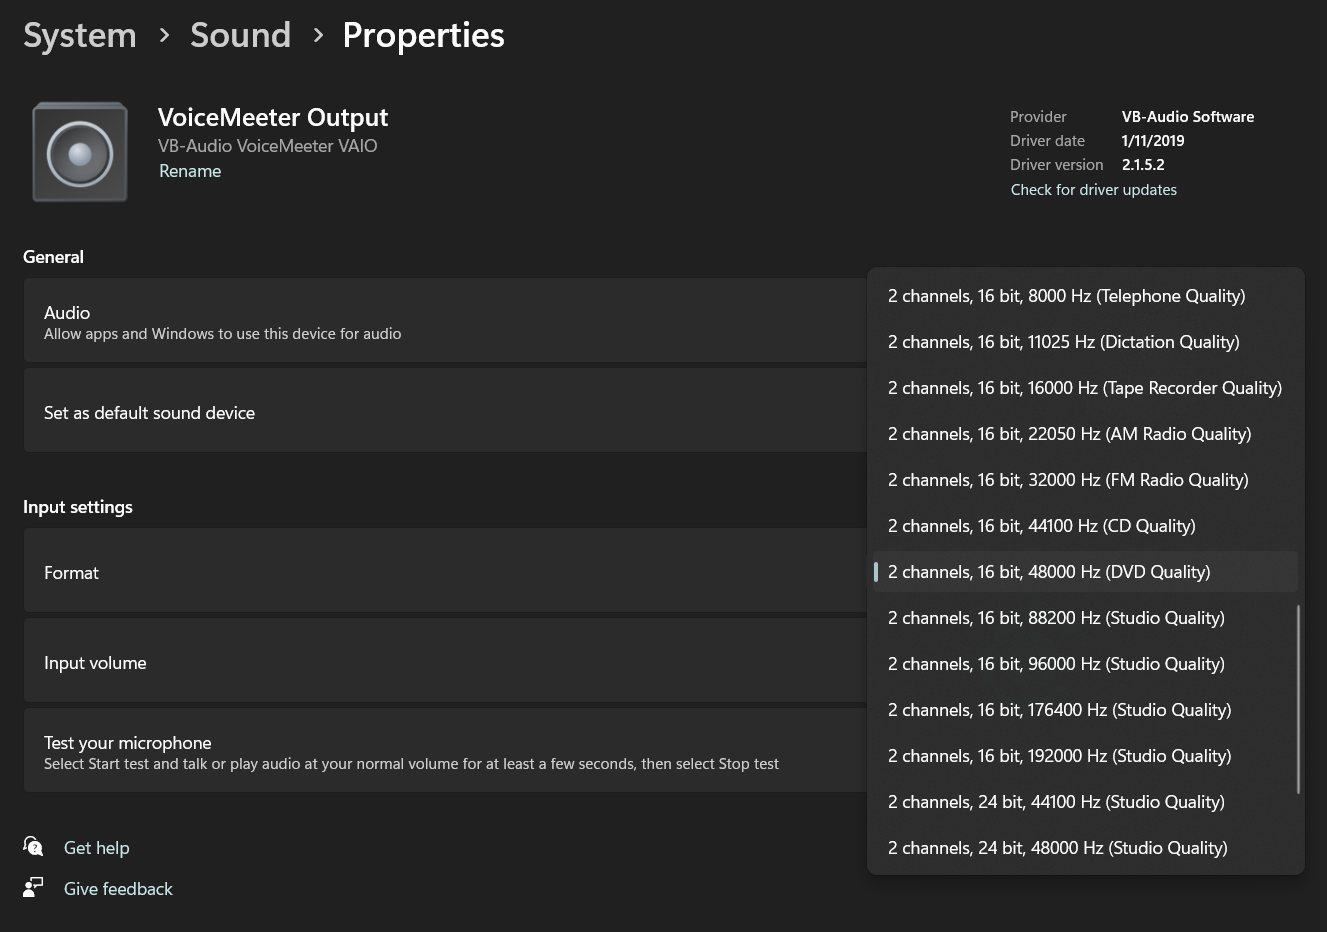
We want to make sure that we set VoiceMeeter to be both our Audio Input and Audio Output for our Desktop.
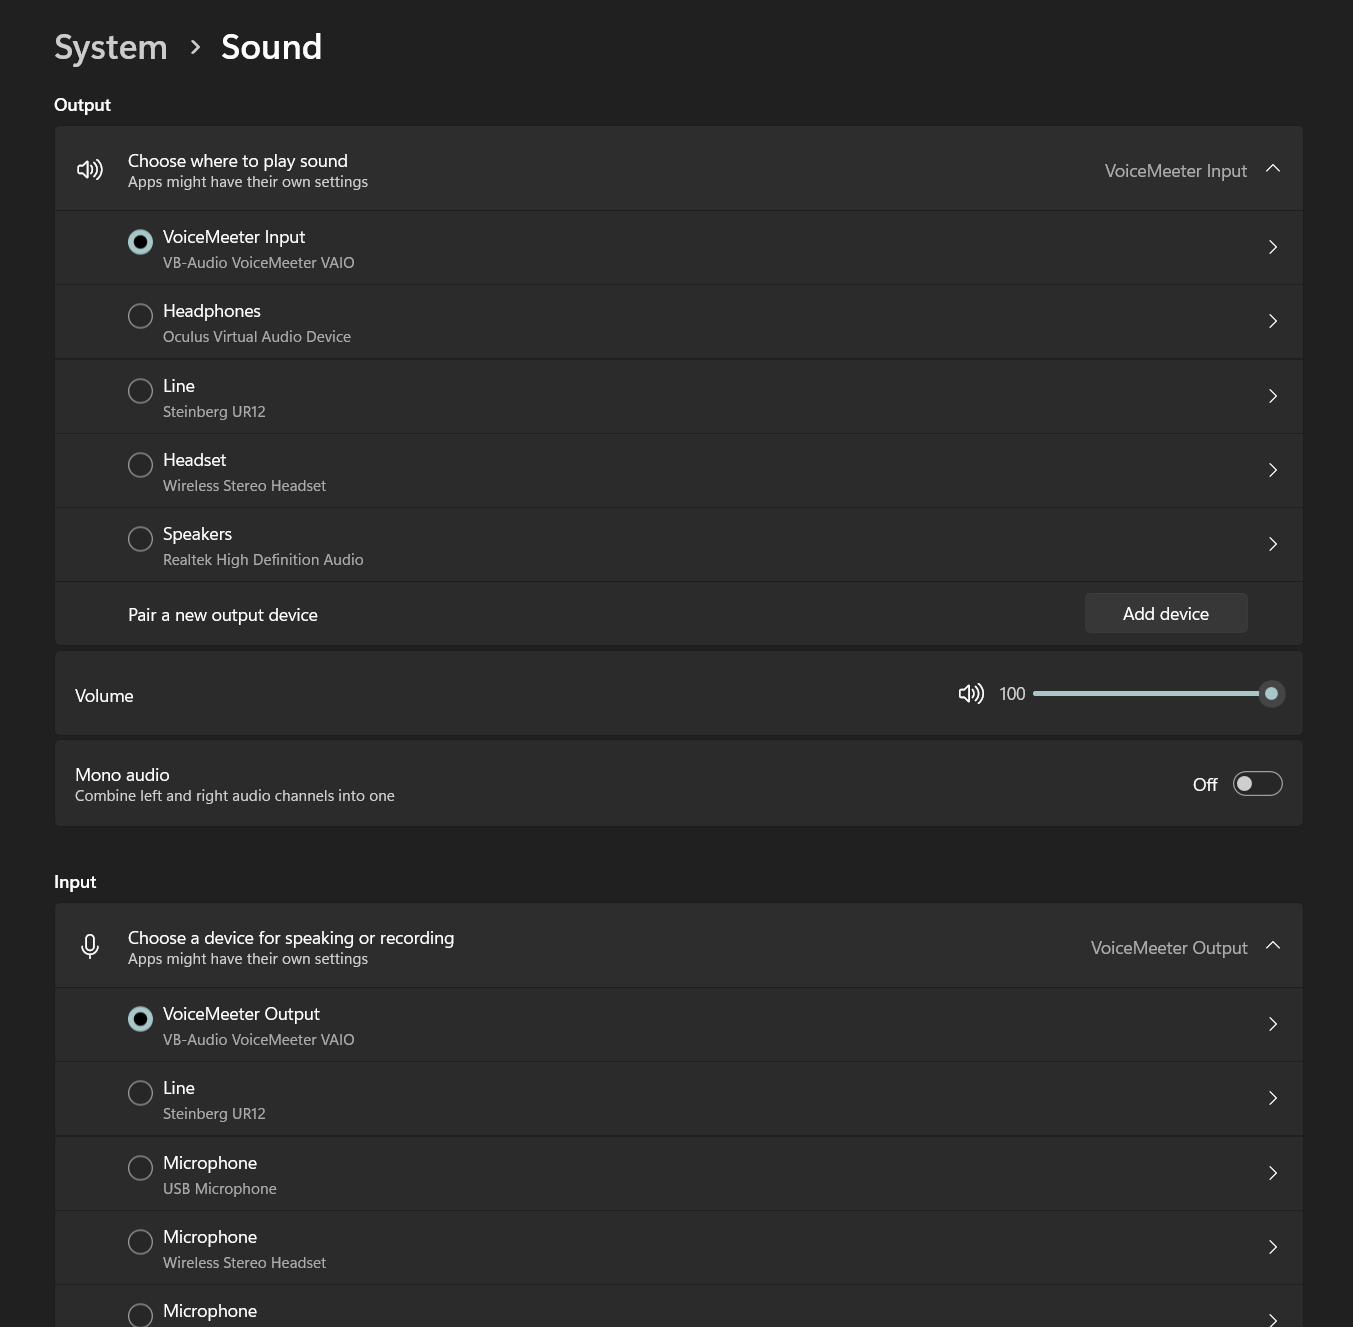
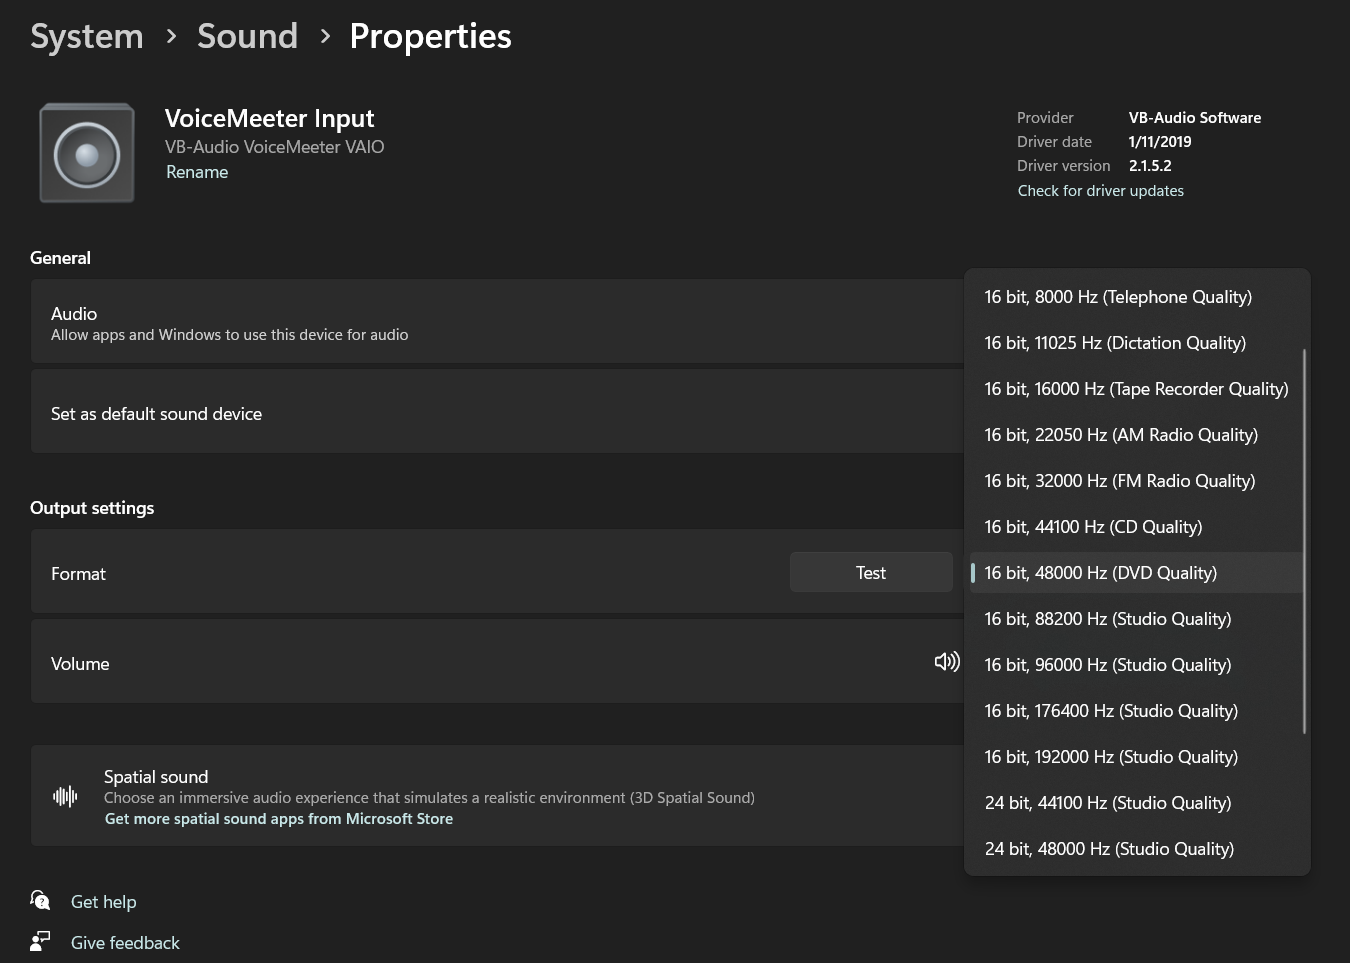
But we want to modify the Sampling Rate of BOTH the Input and Output so that other applications (Discord & Video Games) can handle the input received. This is because VoiceMeeter defaults to using higher sampling rates than other 3rd party applications.
We will set both to 16-bit, 48000 Hz (DVD Quality), as that is what is supported best in 3rd party apps.
 You can also be safe by setting the sampling rate for the raw inputs and outputs that you are rerouting to VoiceMeeter as well
Discord
Now we need to configure our Discord Audio Settings to work with our changes.
This involves switching the Input and Output Devices on Discord, but also playing around with other settings that modify audio, since Discord does a lot of behind-the-scenes work to make your audio more crisp and clean, but will affect you streaming your instrument negatively, so we will need to disable some settings.
Input/Output
 Setting VoiceMeeter as Input/Output
Input Sensitivity
 Disabling Auto-detection for Input Sensitivity
Other Settings
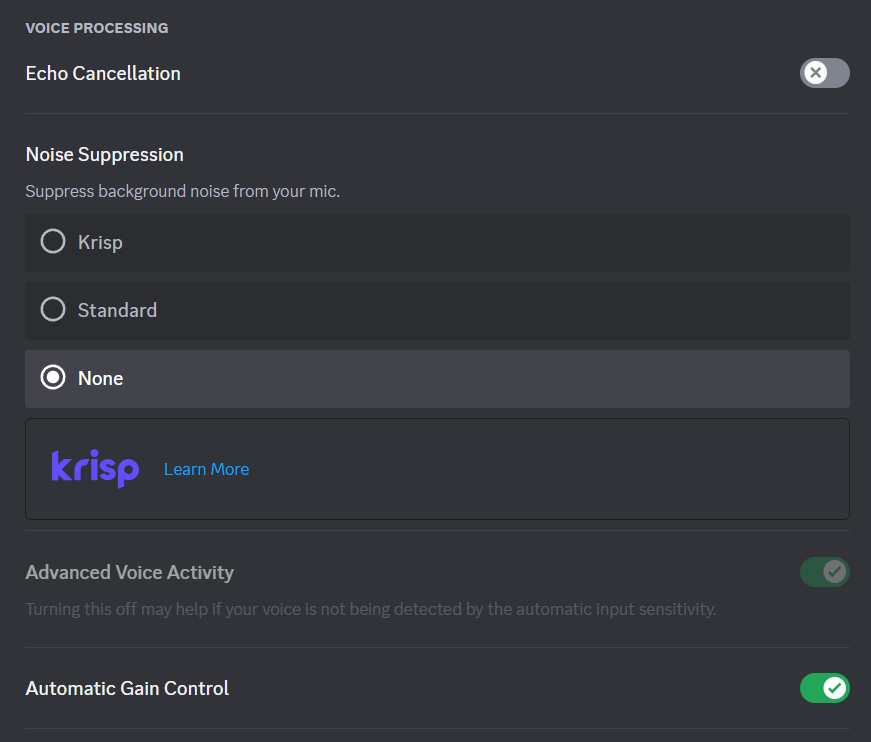 Disabling Echo Cancellation and Noise Suppresion
Video Game Usage
In the video game you play, make sure you set VoiceMeeter to be your input and output device!
We technically have everything setup to stream our audio through discord, and to others, but there is one extra tool I use to make my life a little easier.
AutoHotkey
AutoHotkey is a Desktop Application that allows you to write complex scripts for any key press.
Many video games do not have the option to toggle voice chat, and only have push-to-talk options.
A good example of this is VALORANT

This is not a problem, since we can write a script that essentially turns push-to-talk into toggle.
After downloading the software, you want to run it and make a new script
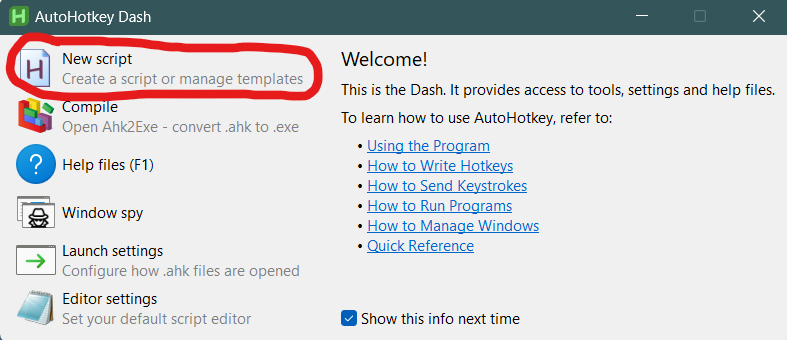
This will create a .ahk file on your computer, which when opened using AutoHotkey, should run it's contents.
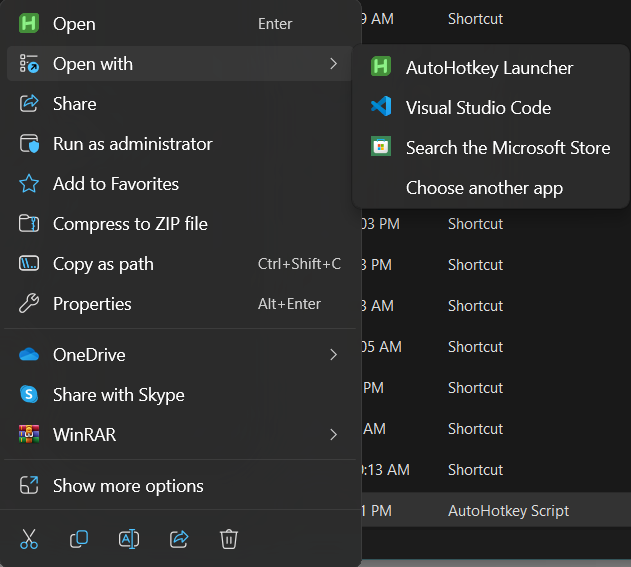
After making a new script, there are two ways to open it. One is using AutoHotkey, which will run the script. The other is to open it in a text editor or IDE, where you can modify the file.
To modify it, you can right click and select "Open with, and select your IDE.
My IDE of choice is Visual Studio Code:
This is the content of my script:
Voice Chat.ahk
#maxThreadsPerHotkey, 2
setKeyDelay, 50, 50
setMouseDelay, 50
bananaNumpad2 := 0
bananaNumpad3 := 0

$F12::
    bananaNumpad2 := !bananaNumpad2
    if (bananaNumpad2)
    {
        send, {Numpad2 down}
    }
    else
    {
        send, {Numpad2 up}
    }
return

$F11::
    bananaNumpad3 := !bananaNumpad3
    if (bananaNumpad3)
    {
        send, {Numpad3 down}
    }
    else
    {
        send, {Numpad3 up}
    }
return
Here, I have configured F12 to toggle Numpad2, and F11 to toggle Numpad3.
Numpad2 corresponds to my push-to-talk for team chat, while Numpad3 corresponds to my push-to-talk for party chat (Yes, I am a left-handed gamer, don't make fun of me). So this script allows me to toggle both chats by clicking F12 and F11 respectively.
Now we can run it when in game, and we can be extremely annoying, or a show-off!
Final Steps
There is one last thing we can do to make this more seamless for us.
Let's add our AutoHotkey Script to our startup applications, so we don't need to manually run it every time we turn on our computer.
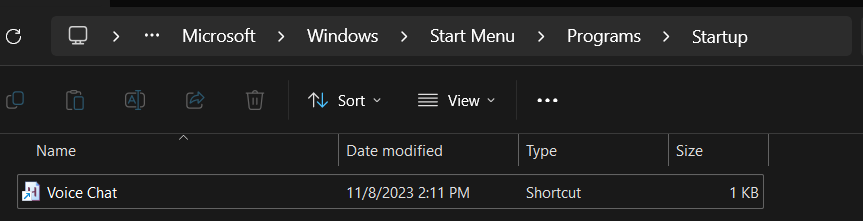
To do this, we just need to add a shortcut in our Startup Folder.
We can access this folder by opening the "Run" app via the windows search bar, and typing "shell:startup":
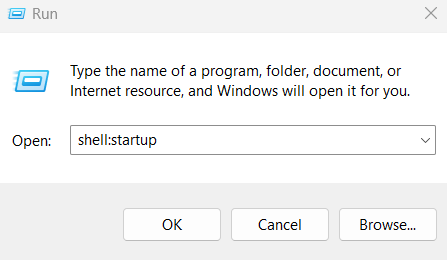
This will open up our Startup Folder, where we can place our shortcut, so we no longer have to open the script manually!
As for our VoiceMeeter application, we will instead use the Task Scheduler to boot it up on login.
The reason for this is that if we use the startup folder for VoiceMeeter, it actually loads in too early, and messes up the configuration! This can cause your audio to have crackles and pops, when it shouldn't.
Firstly, we will open our Task Scheduler and create a basic task:
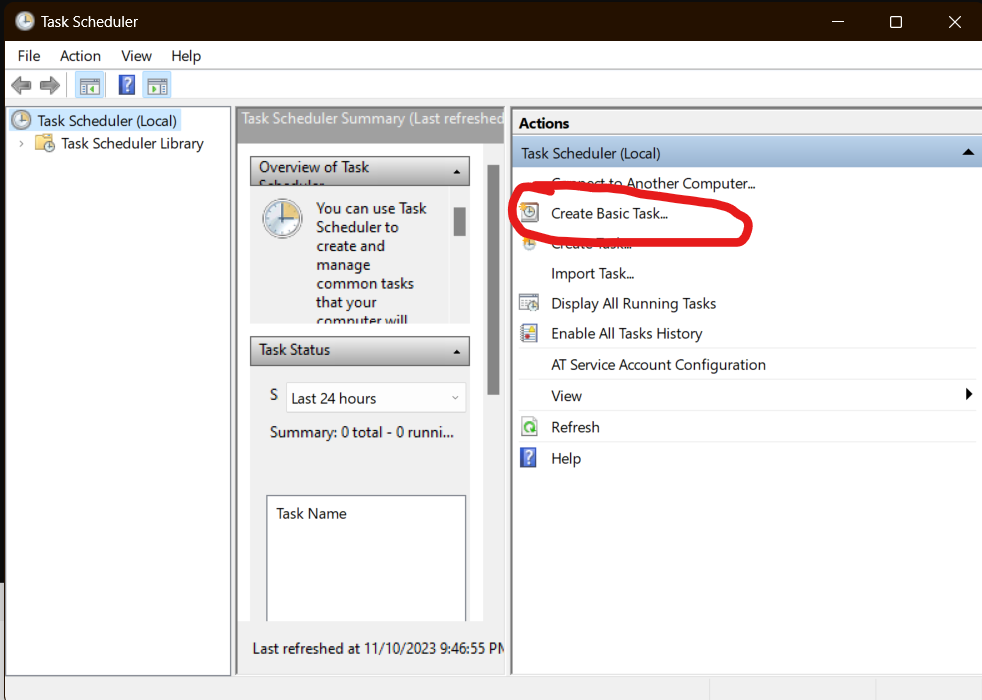
Then, all you have to do is name it, set the trigger to When I log on, for the action, select Start a program and set it to point at your VoiceMeeter.exe path location.
And voila! You no longer have to open up these apps manually to get your setup to work!
Do you like unhinged content? Follow me on X! Or Buy me a coffee!